The Role of Hip and Ridge cap in Roofing

As a roofing contractor, I’ve witnessed the evolution of roofing techniques and materials, all aimed at enhancing the durability, functionality, and aesthetic appeal of roofs. In this comprehensive guide, we will delve into the significance of hip and ridge cap on for asphalt shingles, tile roofing, and standing seam roofing in both residential re-roofs and new construction roof installations, particularly focusing on our operations in Gainesville, Florida.
Understanding Hip and Ridge Shingles
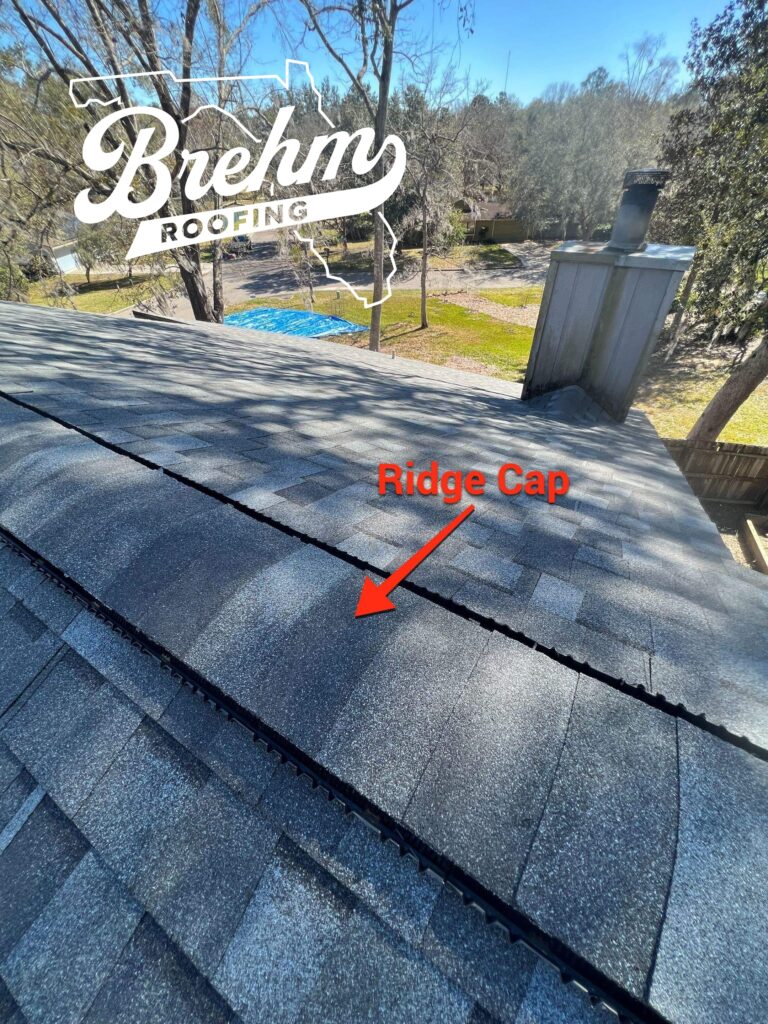
The Anatomy of a Roof: Before we explore hip and ridge shingles, it’s crucial to understand the basic structure of a roof. A typical sloped roof consists of several components, with hips and ridges being the critical areas. The ‘hip’ refers to the external angle formed by the intersection of two sloping roof planes, while the ‘ridge’ is the highest point on the roof, where two roof areas converge.
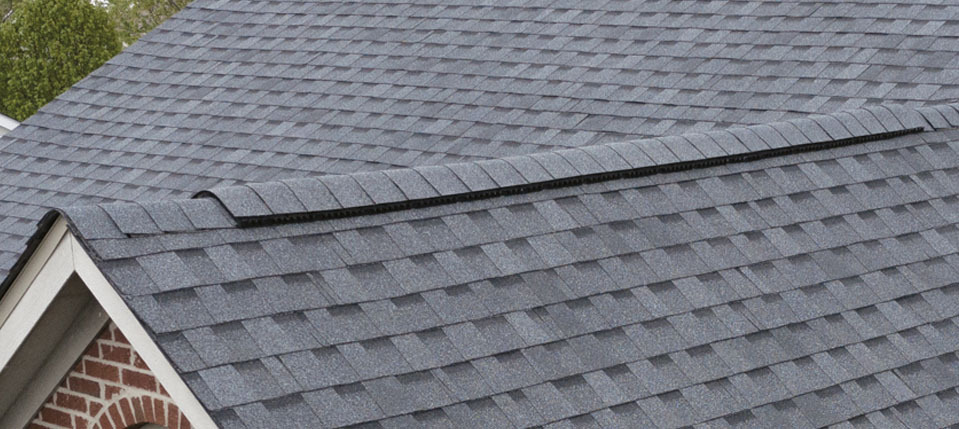
Hip and Ridge Shingles – A Closer Look: Hip and ridge shingles are specially designed to protect these critical areas of a roof. Unlike regular shingles, these are shaped and constructed to provide enhanced protection and aesthetic alignment with the unique angles and exposures of hips and ridges.

The Importance of Hip and Ridge Shingles
Protection Against the Elements: In Gainesville, where weather can be unpredictable, the hip and ridge shingles play a pivotal role in safeguarding your home. They provide an additional layer of defense against water infiltration, wind, and other environmental factors that can compromise the integrity of the roof.
Aesthetic Integration: Besides functionality, hip and ridge shingles contribute significantly to the overall aesthetic appeal of the roof. They offer a seamless finish, ensuring a polished and professional appearance.
Brehm Roofing’s Approach to Installing Hip and Ridge Shingles
Our Installation Process: At Brehm Roofing, our experienced team installs hip and ridge shingles with precision and care. We follow a meticulous process that involves aligning the shingles perfectly with the roof’s contours, ensuring maximum protection and visual appeal.
Why We Use 4 Nails Per Shingle: Our commitment to quality and durability is evident in our installation technique, where we use four nails per shingle. This approach provides enhanced stability and longevity, ensuring that the shingles remain secure even under harsh weather conditions.
The Evolution of Hip and Ridge Shingles in Roof Installations
In the book by Todd A. Smith, titled ‘Roofing with Asphalt Shingles’, he suggests, there’s a poignant reflection on the evolution of roofing techniques. The photo harks back to a time when roof installations commonly used 3-tab shingles, cutting them to serve as hip and ridge shingles. This method, though functional, lacked the specialized design and efficiency offered by today’s hip and ridge shingles.
Why Hip and Ridge Shingles are a Must for Asphalt Shingle Roof Replacement
Enhancing Roof Longevity: When it comes to asphalt shingle roof replacement, hip and ridge shingles are not just an add-on but a necessity. They are critical in extending the lifespan of your roof by providing extra protection to the most vulnerable parts.
Compliance with Building Codes: In many regions, including Gainesville, the use of hip and ridge shingles is not just a best practice but a requirement according to local building codes. This compliance ensures that your roof meets all the necessary standards for safety and durability.
Maximizing Durability: Understanding Hip and Ridge Tiles in High Wind Areas
Hip and ridge tiles are integral components of a roofing system, particularly in high wind areas like Florida. These tiles cap the intersection points of a roof, namely the hips and ridges, which are crucial for both the structural integrity and overall waterproofing of the roof.

Hip and Ridge Tiles – Defining Their Role: Hip and ridge tiles are specially designed to fit over the roof’s hip (where two roof slopes meet at an angle) and the ridge (the peak where two roof slopes meet). These areas are particularly susceptible to water ingress and wind uplift, making their protection vital.
Attachment Methods for Enhanced Durability: The FRSA-TRI Florida High Wind Tile Installation Manual outlines three primary attachment methods for hip and ridge tiles – mechanical attachment, adhesive-set, and mortar-set systems. Each method offers different advantages in terms of stability and durability, especially under high wind conditions.
The Significance of Headlap: The headlap, or the part of the tile that overlaps with the adjoining tile, is crucial for waterproofing. The manual recommends a minimum headlap of 2 inches for hip and ridge tiles, unless the tile’s design restricts this. This overlap ensures a tight seal, preventing water from seeping through the joints.
Covering Exposed Fasteners for Longevity: Exposed fasteners can be a weak point in any roofing system. The manual advises covering any exposed fasteners with a UV-resistant sealant to protect against corrosion and UV damage, thereby prolonging the life of the roof.
In summary, understanding and correctly implementing the best practices for hip and ridge tile installation, especially in high wind areas, is crucial. These tiles not only enhance the aesthetic appeal of the roof but more importantly, they play a pivotal role in protecting the most vulnerable parts of the roof from water and wind damage.
Installation of Hip and Ridge on Standing Seam Metal Roofs
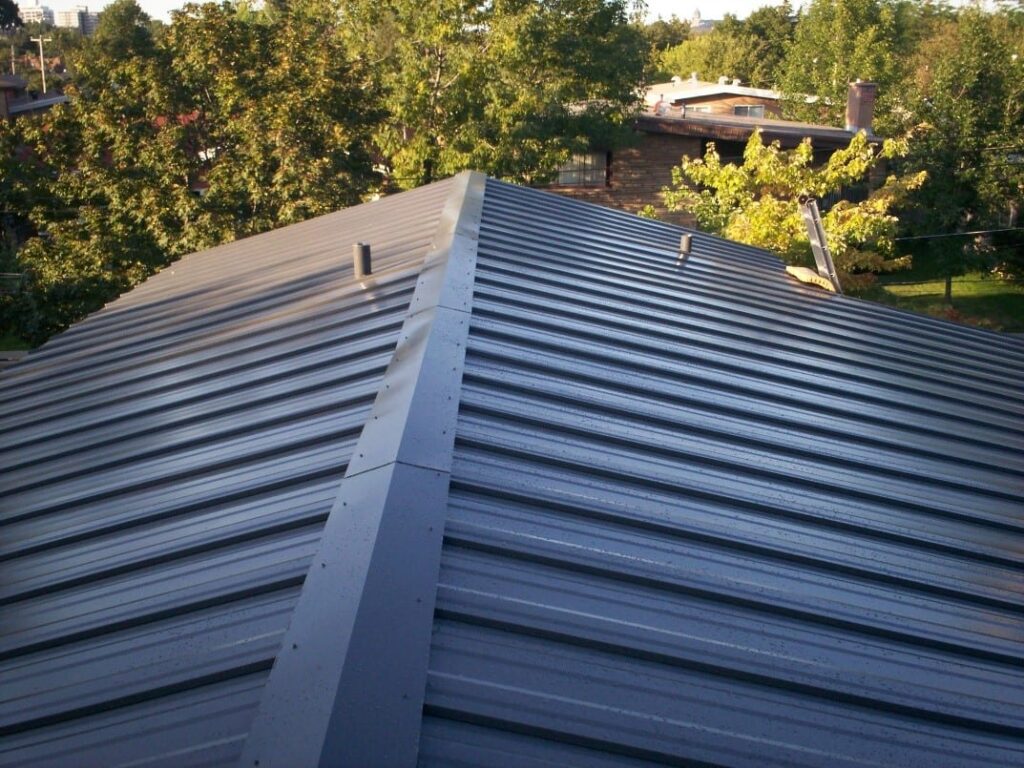
When it comes to standing seam metal roofing, the installation of hip and ridge components is a meticulous process that ensures both the functionality and aesthetic appeal of the roof. Here’s an insightful breakdown of the process, as discussed by Thad and Jason from Sheffield Metals:

Preparation is Key: The process begins with ensuring that the roof deck is clean and ready for installation. The underlayment is then added as per the manufacturer’s installation instructions, followed by paneling the roof. This preparation is crucial for a smooth installation process.
Installing the Hip or Ridge: The next step involves the installation of Z closures with 3/16 by 7/8-inch butyl tape, attached at four inches on center with 10 by 1-inch pancake head fasteners. The purpose of this spacing is to ensure full compression through the butyl tape, enhancing the seal and stability of the installation.
Sealing for Maximum Protection: A crucial step is the application of a vertical bead of sealant up and over the panel rib to seal off the sides of the Z closure. This step is essential in preventing water ingress and ensuring the longevity of the roofing system.
Ridge Assembly and Finishing Touches: The ridge assembly includes careful placement of ridge flashing and making sure it integrates seamlessly with previously installed components like the rake details. The use of stainless steel pop rivets is recommended for attaching the ridge or hip cap. Finally, cleaning off any swarf, filings, and debris from the installation process is important to prevent any potential rust and maintain the integrity of the paint finish.
Attention to Detail: Throughout the process, the emphasis on detail is evident. For instance, the recommendation for a minimum length of flashing (24 inches) and the placement of rivet attachments (center of every panel) showcase the precision required in such installations.
This comprehensive approach to installing hip and ridge on standing seam metal roofs not only ensures a roof that is visually pleasing but one that stands strong against environmental challenges, particularly in high wind areas. The meticulous process highlights the expertise and precision necessary in roofing installations, something that Brehm Roofing, as a skilled roofing contractor, consistently applies in its projects.
Conclusion: The Essential Role of Hip and Ridge Components in Roofing
In conclusion, this comprehensive guide has delved into the critical role of hip and ridge components across various roofing types, emphasizing their importance in both residential re-roofs and new construction installations. As a seasoned roofing contractor, Brehm Roofing in Gainesville, Florida, understands the nuances of these components in enhancing roof longevity, compliance with building codes, and ensuring aesthetic appeal.
Key Takeaways:
- Hip and Ridge Shingles for Sloped Roofs: We’ve explored how hip and ridge shingles provide vital protection against environmental elements and contribute significantly to the aesthetic integration of sloped roofs. Our commitment at Brehm Roofing to using four nails per shingle underlines our dedication to quality and durability.
- Importance in High Wind Areas: The discussion on hip and ridge tiles, especially in high wind areas like Florida, highlights their indispensable role in safeguarding the roof’s most vulnerable points. The FRSA-TRI Florida High Wind Tile Installation Manual offers valuable insights into best practices for installation, ensuring roofs can withstand challenging weather conditions.
- Standing Seam Metal Roof Details: The intricate process of installing hip and ridge components on standing seam metal roofs, as elucidated by experts from Sheffield Metals, showcases the precision and attention to detail necessary for a successful installation. This process ensures both functional integrity and aesthetic harmony of the roof.
At Brehm Roofing, we take pride in our expertise and meticulous approach to roofing installations. Understanding the critical role of hip and ridge components across various roof types allows us to provide roofs that are not only visually stunning but also structurally sound and durable. Whether it’s a residential re-roof, a new construction project, or a specialized installation on a standing seam metal roof, our dedication to excellence remains unwavering.
In the ever-evolving landscape of roofing techniques and materials, Brehm Roofing stands as a beacon of reliability and expertise, committed to delivering roofing solutions that meet and exceed the expectations of our clients in Gainesville and beyond.
